Face Signing
How an eID holder can use their SensePrint to sign a piece of data
Just as a private key can be used in cryptographic systems to sign a piece of data (usually its SHA256 hash), in Face PKI, a face, SensePrint, and a purpose ID can be used to sign some data.
The steps in this process are the following:
Generate a SHA256 hash of the data to be signed.
Base64 encode the SHA256 hash.
Send the Base64 encoded string to the server along with a SensePrint and a purpose ID.
The algorithm used for the signature is the Elliptic Curve Digital Signature Algorithm (ECDSA). Thus, the generated signtature can also be independently verified using a Face Certificate containing the public key for the same purpose ID.
As before, on the Swagger Docs page authorize using the API Key you setup earlier.
Expand the /face-sign section and then click the Try it out button as shown below:
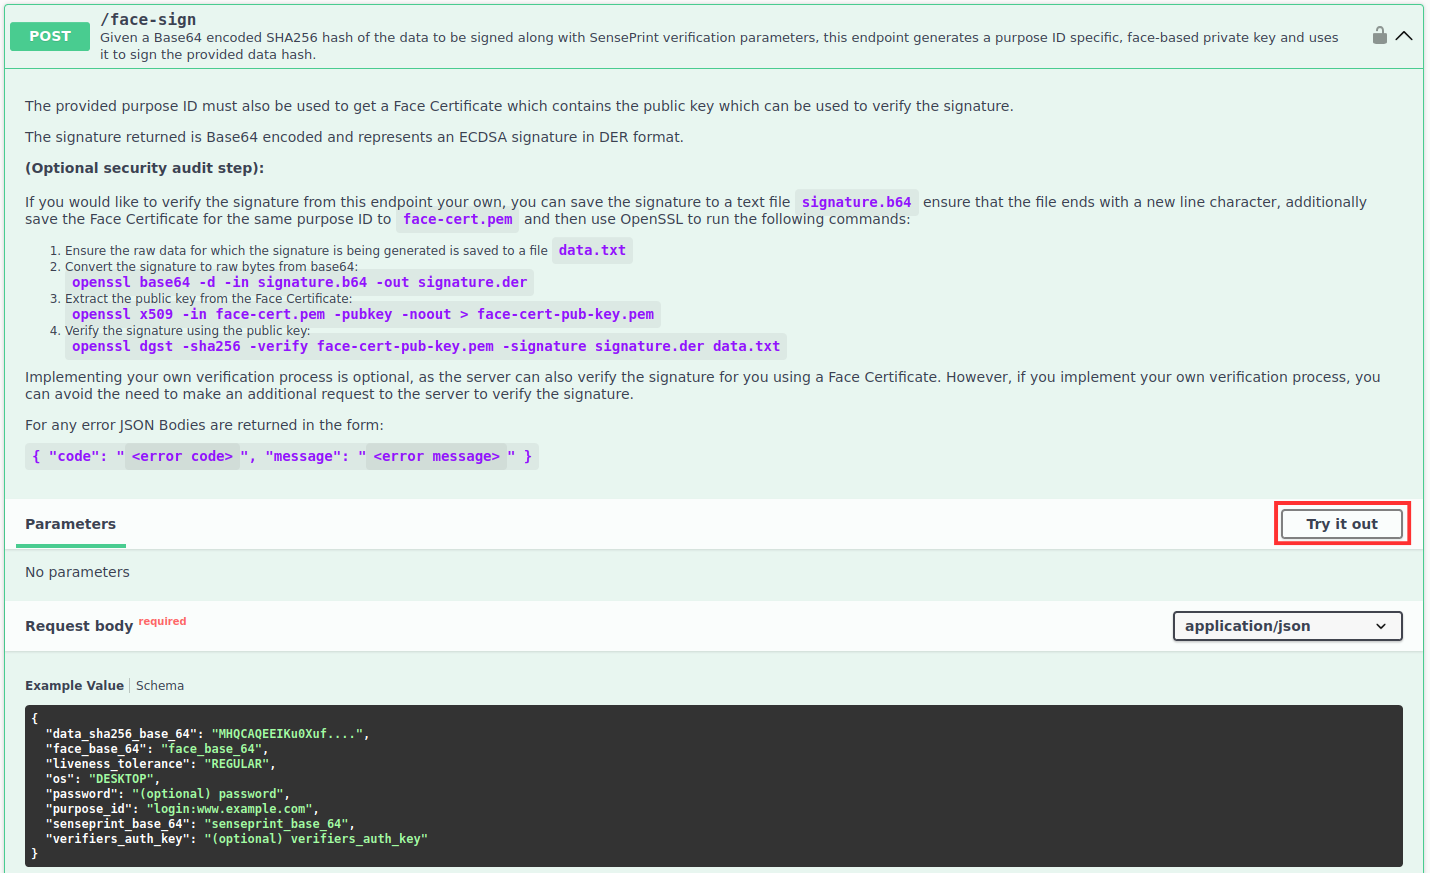
Upon clicking Try it out you should be able to submit the data as shown below:
The following summarizes the parameters for the request:
data_sha256_base_64- given a piece of data (bytes), it should then be SHA256 hashed to obtain 256 bits. The hash should then be Base64 encoded to send it to the APIface_base_64- the face of the SensePrint eID holderliveness_tolerance(optional) - the tolerance of the liveness algorithm used to check for a live face before allowing the signing to proceed.os(optional) - indicates the operating system the image was captured on. Valid values areANDROID/IOS/DESKTOP.password(optional) - the same password (if one was specified) that was used during the SensePrint generation.purpose_id- a unique purpose ID. This should match the purpose ID that was used to generate the Face Certificate that will be used to verify the signature.senseprint_base_64- the foundational SensePrint eID in raw form.verifiers_auth_key(optional) - the sameverifiers_auth_key(if one was specified) that was used during the SensePrint generation.